Resources:
UPS HAT for LattePanda 3 Delta / 2 Alpha / Delta – Reliable Power Backup with HID-UPS Support: Keep your LattePanda safe during outages
The UPS HAT for LattePanda 3 Delta, 2 Alpha, and Delta is a dedicated uninterruptible power supply solution designed to protect your LattePanda single board computer from sudden power failures. Using three 18650 lithium-ion batteries, it ensures stable and continuous power delivery, automatically switching to battery mode when the external power supply is interrupted.Supporting both USB Type-C PD and 5.5mm DC input, this UPS HAT offers flexibility in power setups. With HID-UPS protocol support, it can be recognised as a native battery device in the operating system, allowing you to configure power-saving modes, automatic shutdowns, and battery management features just like a laptop.
Built with an Arduino-based open-source HID-UPS implementation, it allows developers to customise battery algorithms, charging voltage limits, and behaviour, extending both system performance and battery lifespan. In testing, the UPS HAT powered a LattePanda 3 Delta for up to 8 hours using three 3400mAh 18650 batteries, making it an ideal backup solution for edge computing, IoT deployments, robotics, and mission-critical projects.
Key Features:
- Wide Compatibility: Works with LattePanda 2 Alpha, Delta, and 3 Delta boards.
- Uninterrupted Power: Automatically switches to battery mode during outages.
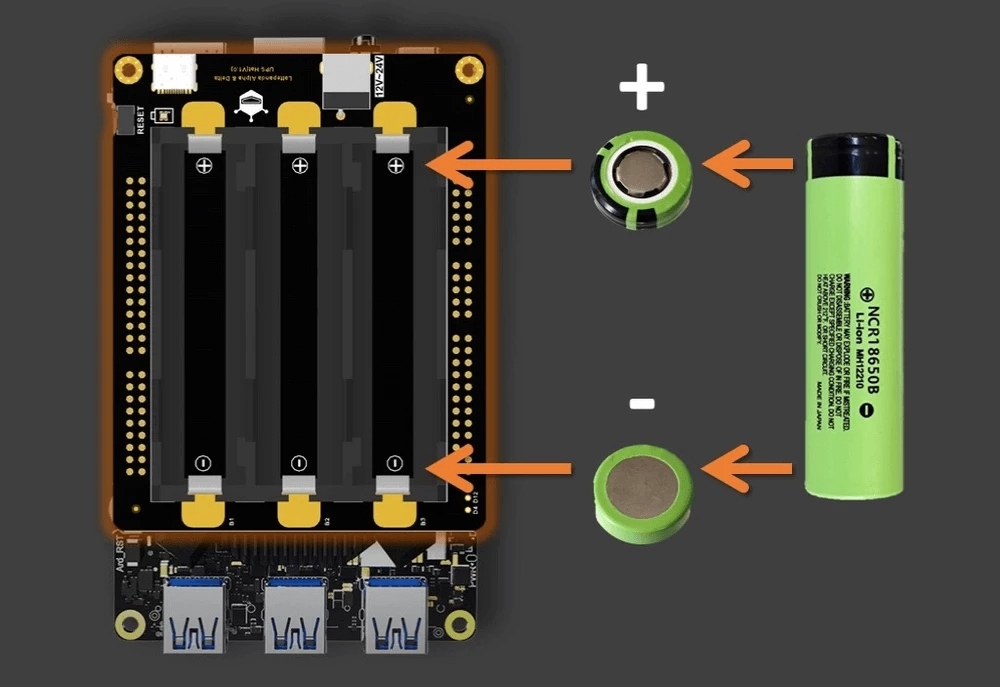
- Battery Support: Uses 3 × 18650 lithium-ion batteries (not included).
- Dual Input Options: Compatible with Type-C PD (20V) and 5.5mm DC (19–24V) power sources.
- HID-UPS Protocol: Appears as a battery device in the OS for power management & auto-shutdown.
- Arduino Open-Source Integration: Customisable battery algorithms and voltage settings.
- Efficient Power Delivery: Direct battery supply without boost/buck conversion for longer runtime.
- Battery Life: Up to 8 hours backup with 3 × 3400mAh 18650 cells.
- Applications: Ideal for IoT systems, robotics, edge computing, and embedded servers.
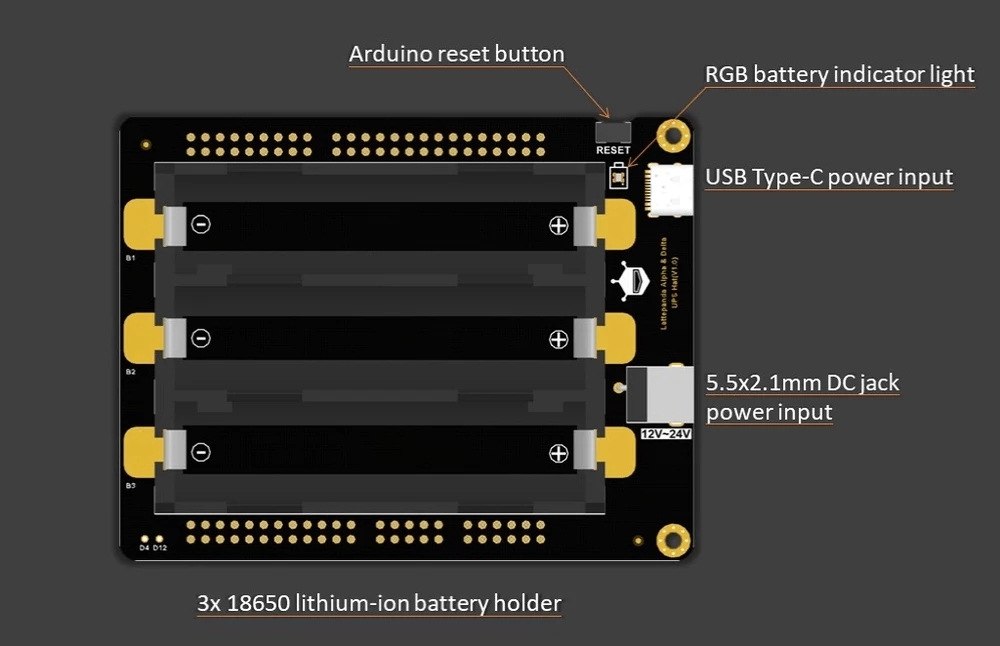
Interfaces of LattePanda Alpha & Delta UPS Hat
Installation Steps
Step 1. Align the UPS power interface side with the LattePanda TypeC/RJ45/HDMI interface side
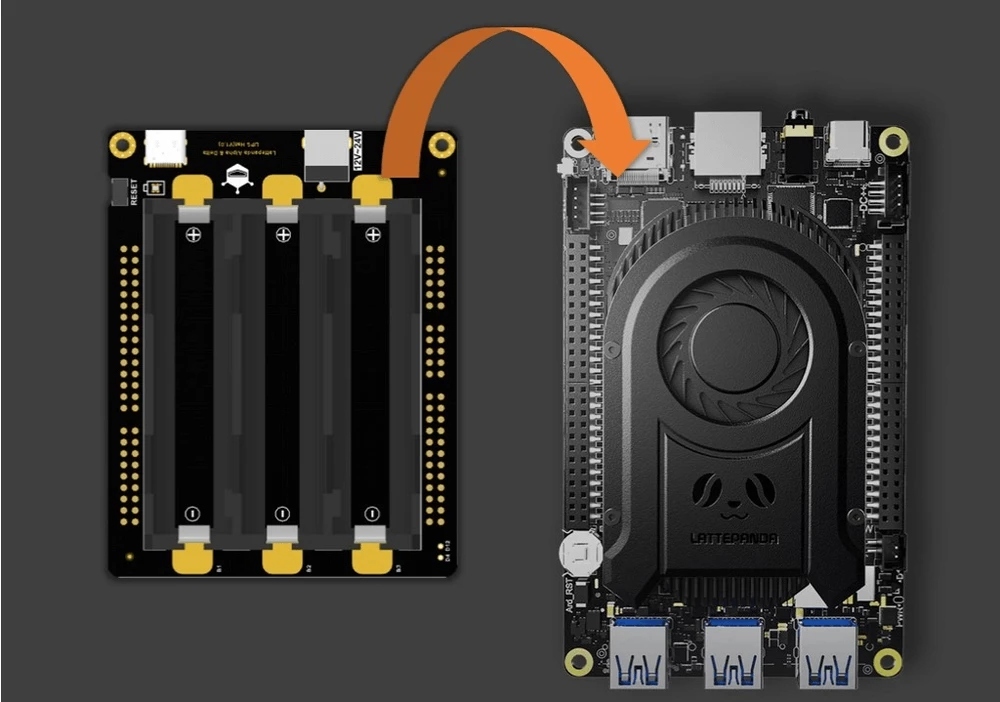
Step 2. Insert the UPS Hat into the LattePanda
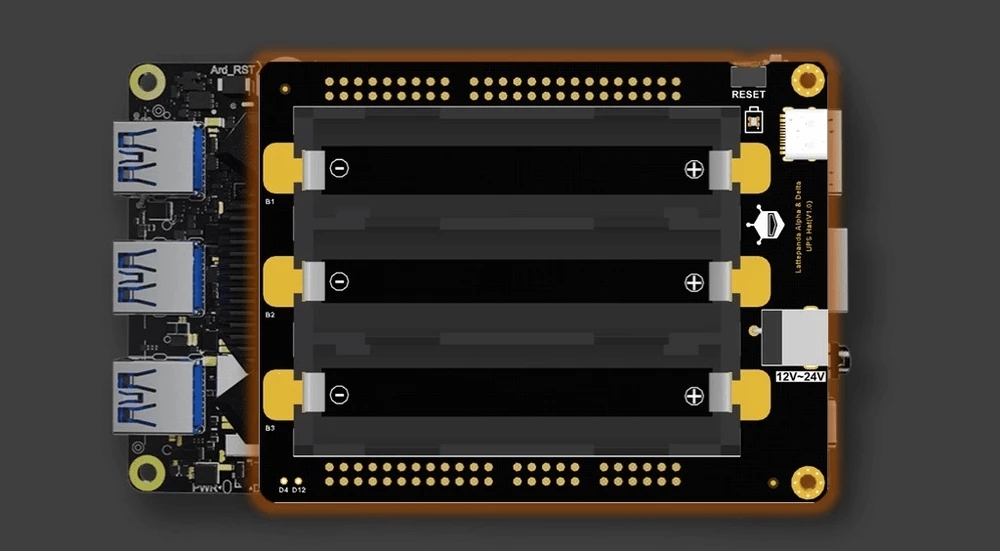
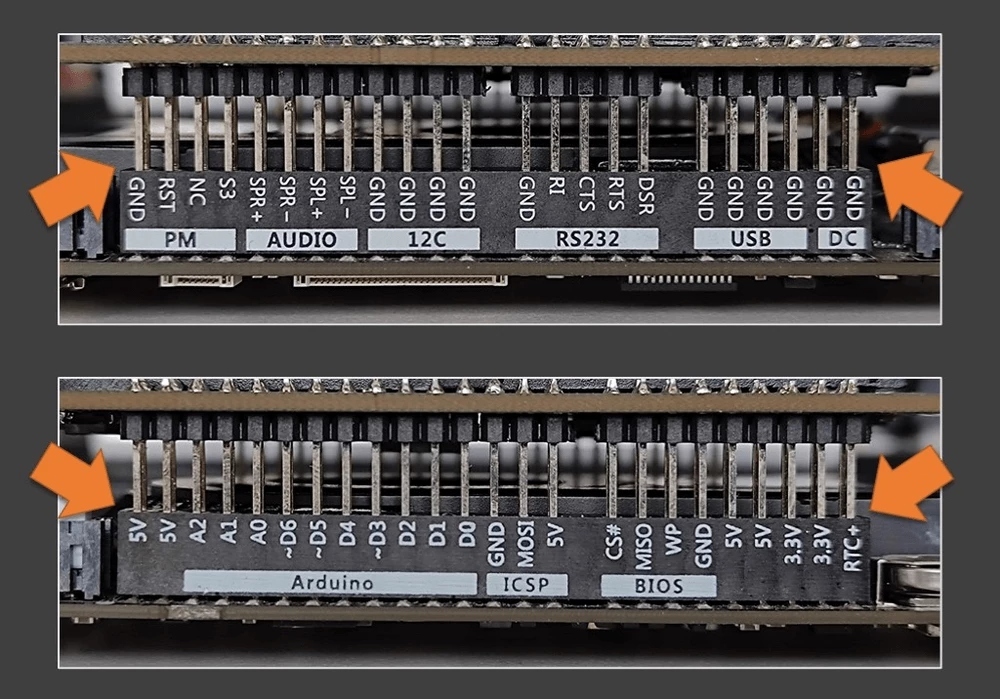
Step 3. Check that the pins are fully inserted in order, without any floating or bent pins.
The UPS Hat pins are longer to provide for better heat dissipation and airflow. The figure depicts how the installation will appear after completed.
Step 4. After checking the installation, install the 18650 lithium battery, paying attention to the positive and negative directions
Package Content:
- LattePanda Alpha & Delta UPS Hat x1


