How to Build Your First Bluetooth Module Project: A Beginner's Guide
Published by Sumit Chawla on 29th Apr 2025
Bluetooth modules let you communicate wirelessly up to 10 meters. This technology has become vital for DIY electronics projects, even with its shorter range compared to other wireless options.
Building a remote-controlled robot or setting up a wireless sensor network needs a solid grasp of Bluetooth module principles. The market offers several types like data transmission and remote control modules, each built for specific uses. Setting up a Bluetooth module with Arduino becomes simple once you grasp the fundamentals - perfect for newcomers to wireless projects. The slower data speeds compared to WiFi might affect large file transfers or HD video streaming.
This piece will teach you to build your first Bluetooth project from the ground up. You'll find everything from basic components to wiring diagrams, code samples, and fixes for common issues. Soon you'll know how to use Bluetooth technology across applications while understanding what it can and cannot do.
Understanding Bluetooth Modules and Their Use Cases
Bluetooth technology is the life-blood of wireless communication in many electronic projects. A good grasp of bluetooth modules will help you make this technology work in your own creations.
What is a Bluetooth module and how it works
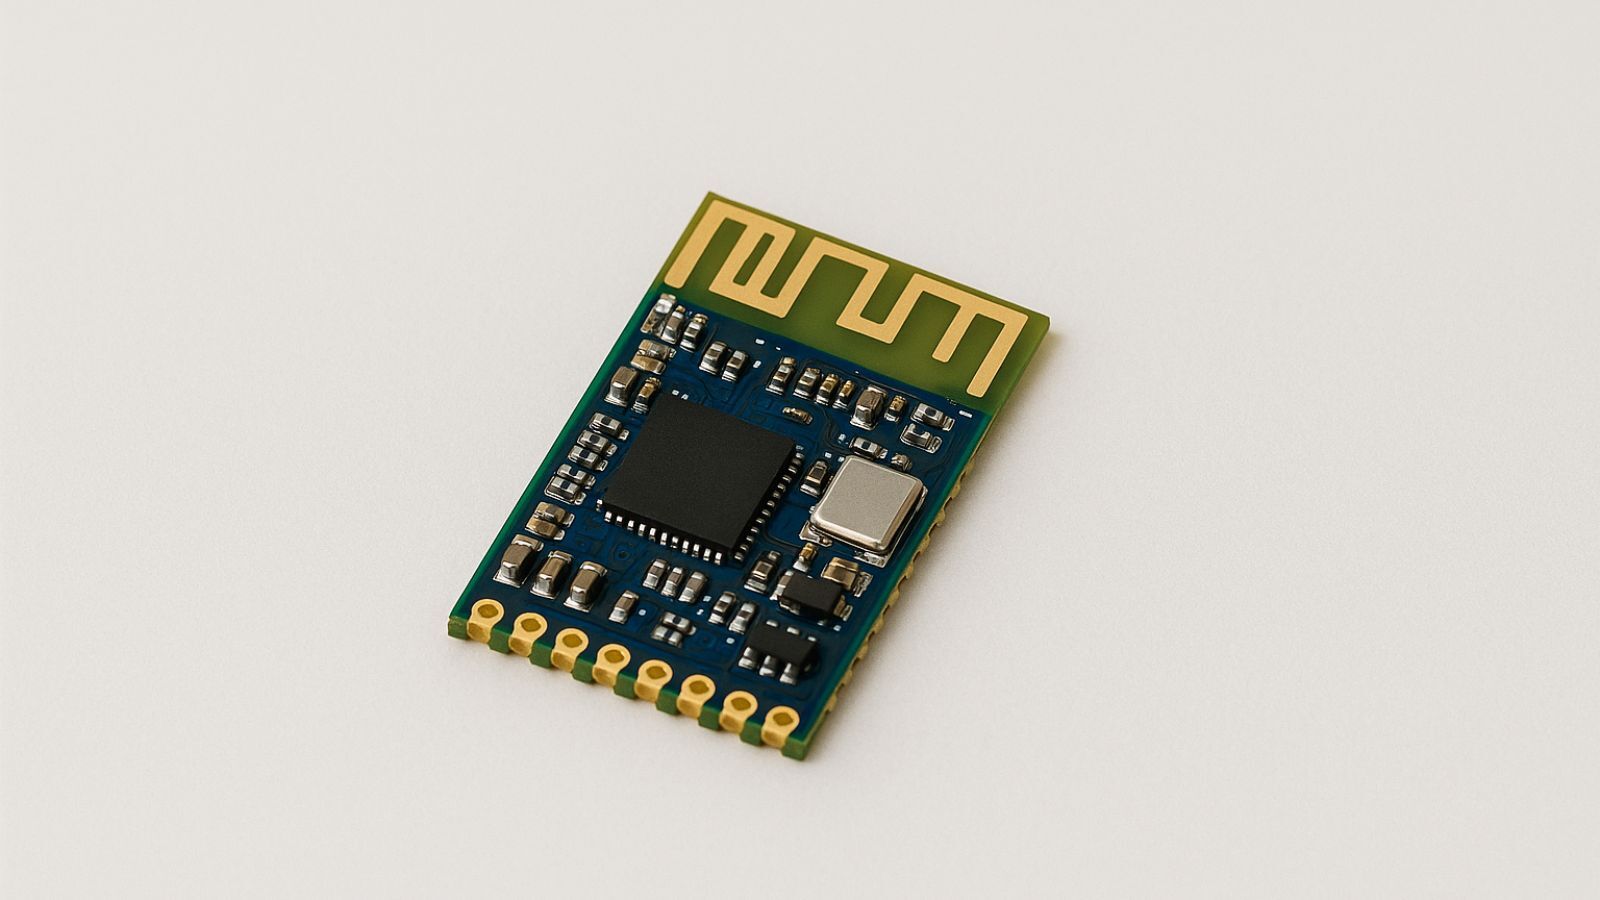
A bluetooth module bridges your microcontroller and the Bluetooth network. It works as a translator that turns serial data into wireless signals. These small devices work on the 2.4 GHz ISM frequency band and use radio waves to connect devices like smartphones, computers, and microcontrollers. The signal can reach up to 10 meters in open space, though this range changes based on surroundings and the module's class.
The module's connection process follows specific steps. The module starts in discovery mode and broadcasts its name, profile, and MAC address. The pairing phase happens next, where devices verify a PIN code (usually "0000" or "1234") and swap security keys. The actual data exchange takes place during the connecting phase.
Most bluetooth modules employ UART (Universal Asynchronous Receiver/Transmitter) communication protocols, which makes them easy to integrate with microcontrollers. They work on 3.3V logic levels, and many modules have voltage regulators that let them accept 5V input power.
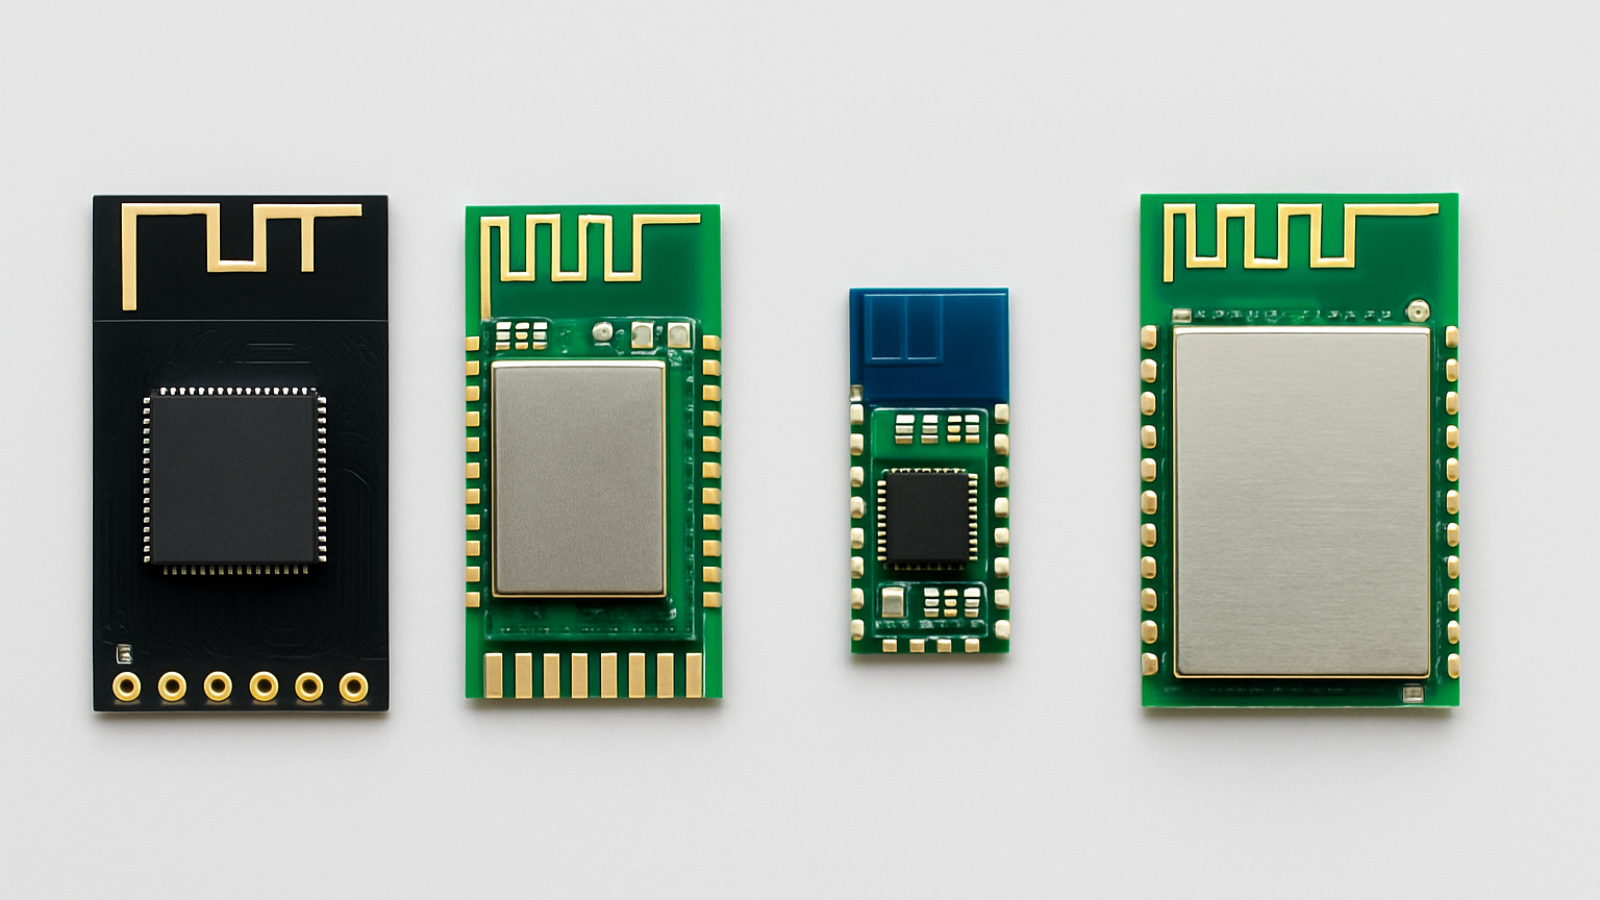
Types of Bluetooth modules: HC-05, HC-06, BLE
Different bluetooth modules suit different project needs. The HC-05 bluetooth module stands out as a favorite for hobbyist projects. It uses Bluetooth 2.0 standard and can work in both master and slave modes—so it can start connections or accept them. The HC-05's red LED blinks faster when unpaired and slower after connecting.
The HC-06 bluetooth module works only in slave mode, so it can't start connections on its own. While it shares many features with the HC-05 and uses Bluetooth 2.0, it has fewer pins and limited setup options. Notwithstanding that, the HC-06 offers a budget-friendly choice for basic projects that need only slave functionality.
Bluetooth Low Energy (BLE) modules represent newer technology built for IoT applications that need minimal power. These modules use 40 channels instead of Classic Bluetooth's 79 channels and work well in devices that must run for months or years on battery power. BLE modules can reach 30 meters and send data at about 1 Mbps.
Common use cases in DIY and IoT projects
Bluetooth modules power many DIY and IoT projects. These modules make wireless control of lights, fans, and household appliances possible through smartphone apps. You can turn regular appliances into smart devices with an Arduino, HC-05 module, and relay board.
Robot projects use bluetooth modules to create wireless control systems that send movement commands from phones to robots. This removes the need for physical controllers or wired connections.
Health tracking presents another key use case. Wearable devices with BLE modules can send heart rate, step counts, and health data to phones for up-to-the-minute monitoring.
Industry benefits from bluetooth modules to collect data from sensors across manufacturing spaces. Teams can analyze this data to boost efficiency and spot problems before failures occur.
Audio projects thrive with bluetooth technology, particularly those using Classic Bluetooth modules that handle higher data rates for quality sound. This covers wireless speakers, headphones, and audio streaming devices.
Bluetooth modules connect our physical and digital worlds. They create opportunities for breakthroughs in any discipline.
Choosing the Right Bluetooth Module for Your Project
Your project's success depends on choosing the right Bluetooth module. Each type comes with unique features that can affect your project's functionality, cost, and complexity.
Comparison: HC-05 vs HC-06 vs BLE modules
The HC-05 module has become a favorite among beginners and experienced makers. It works as both master and slave, which means you can start connections with other modules or accept incoming requests. This flexibility makes it a great match for many applications. The HC-05 comes with 6 pins and lets you use many AT commands to set it up. You'll get better security with the HC-05 because it accepts up to 16-character alphanumeric passwords, which helps prevent unauthorized access.
The HC-06 module works only as a slave device and can't start connections on its own. It's a simpler option with just 4 pins, perfect for projects that only need to receive connections. You can only change the baud rate, name, and PIN through its limited AT command set. The security features are more basic too - you only get a 4-digit PIN instead of the longer passwords the HC-05 offers.
Budget-conscious makers should know the HC-06 costs less than the HC-05, even with fewer features. As one source puts it, "For price, capability, and simplicity's sake, we recommend sticking with the HC-05 device, as it is much simpler to program than the HC-06, has far more capability, and only costs a fraction more."
BLE (Bluetooth Low Energy) modules belong to the newer generation, built on Bluetooth 4.0 and newer standards. These modules shine in power efficiency, which makes them perfect for battery-powered projects. Some newer options like the WF-05 module support Bluetooth 5.2 and advanced features such as Enhanced Data Rate (EDR). They maintain pin compatibility with HC-05 modules for easy upgrades.
Bluetooth module compatibility with Arduino boards
Voltage compatibility becomes crucial when connecting Bluetooth modules to Arduino boards. Most Bluetooth modules run on 3.3V logic, while many Arduino boards like the Uno and Mega use 5V logic. Direct connections could damage your Bluetooth module. You'll need a voltage divider or level shifter between the Arduino's TX pin and the module's RX pin.
The Arduino Software Serial library gives you flexibility by letting you use any digital pins for serial communication with your Bluetooth module. You might connect the HC-05 to pins 2 and 3 instead of the default hardware serial pins (0 and 1), and define these in your code:
#include
SoftwareSerial bt(2, 3); // RX, TX
Baud rate settings need careful attention. HC-05 and HC-06 modules usually default to 9600 baud in data mode, but some HC-05 modules might use 38400 baud in command mode. Some Arduino boards like the Leonardo use different serial interfaces (Serial1 instead of Serial), so you'll need to adjust your code.
The right Arduino board and proper voltage management can help even a basic HC-06 module power impressive wireless projects. Beginners might prefer the HC-06's simplicity, while complex projects benefit from the HC-05's flexibility or a BLE module's efficiency.
Materials and Methods: Setting Up Your First Project
Let's start building your first Bluetooth project by getting the right tools and making proper connections. Here's a practical walkthrough of the components you need, how to wire everything up, and the software setup that creates a working Bluetooth communication system with your Arduino.
Required components: Arduino Uno, HC-05, jumper wires
The right hardware creates the foundation of a successful Bluetooth project. You'll need these basic components:
-
Arduino UNO board (Nano or Mini works too)
-
HC-05 Bluetooth module (HC-06 works but offers fewer configuration options)
-
Jumper wires (male-to-male and male-to-female)
-
Breadboard to assemble your circuit
-
Resistors (1kΩ and 2kΩ) to divide voltage
-
LED and 330Ω resistor if you want to test (optional)
-
USB cable (Type A to B) to program Arduino
Your HC-05 module runs on 3.3V logic levels while Arduino sends 5V signals. Resistors protect your Bluetooth module from damage during communication.
Wiring diagram and connection steps
The HC-05 module needs careful voltage matching when connecting to Arduino. Start by connecting the module's VCC pin to Arduino's 5V output and GND pin to Arduino's ground.
Data transmission needs a voltage divider with 1kΩ and 2kΩ resistors in series. Connect Arduino's TX pin (pin 3) to the 1kΩ resistor's end. The junction between resistors goes to HC-05's RX pin. The 2kΩ resistor's other end connects to ground. This setup safely reduces Arduino's 5V signal to about 3.3V.
The HC-05's TX pin connects straight to Arduino's RX pin (pin 2). The module's 3.3V output works fine as Arduino recognizes it as a HIGH signal.
Installing Arduino IDE and setting up serial monitor
The Arduino IDE download is available on the official website. Windows users can run the executable and follow standard installation steps. Mac users should drag the Arduino app to their Applications folder.
Open Arduino IDE and pick your board type from Tools > Board menu. Next, select the right COM port under Tools > Port. Remove the RX and TX jumper wires between Arduino and Bluetooth module temporarily before uploading code to avoid errors.
Once your code uploads, put the jumper wires back and open Serial Monitor with the icon in the top-right corner or Ctrl+Shift+M. Set the baud rate to 9600 (HC-05 modules' default in data mode) and choose "Both NL & CR" for line endings. Serial Monitor helps you debug and verify that your Bluetooth connection works correctly.
Writing and Uploading Code to Arduino
Your bluetooth module project's software brings the hardware connections to life. After connecting the HC-05 module to your Arduino board, writing code that makes shared communication possible becomes a vital step. Let's explore the code writing process for bluetooth communication and understand serial functions.
Sample Arduino sketch for Bluetooth communication
An LED control sketch provides an excellent starting point for bluetooth module arduino projects. Here's a simple code example that lets you control an LED using bluetooth commands from your smartphone:
char incomingValue = 0; // Variable to store received data

void setup() {
  Serial.begin(9600); // Default communication rate of the Bluetooth module
  pinMode(13, OUTPUT); // Set pin 13 (built-in LED) as output
}

void loop() {
  if(Serial.available() > 0) {
    incomingValue = Serial.read(); // Read data from the serial port

    if(incomingValue == '1') {
      digitalWrite(13, HIGH); // Turn LED ON
      Serial.println("LED: ON");
    }
    else if(incomingValue == '0') {
      digitalWrite(13, LOW); // Turn LED OFF
      Serial.println("LED: OFF");
    }
  }
}
The sketch monitors incoming data from the bluetooth module. The LED turns on when it receives '1' and turns off with '0'.
Using Serial.begin() and Serial.print() for data exchange
Serial functions are the foundations of bluetooth communication. We used Serial.begin() to start serial communication with a specific baud rate—usually 9600 for HC-05/HC-06 modules in data mode and 38400 for HC-05 in AT command mode. Here's the function syntax:
Serial.begin(baudRate);
The right baud rate ensures successful communication between your Arduino and bluetooth module. You can also set additional parameters like data bits, parity, and stop bits:
Serial.begin(9600, SERIAL_8N1); // 8 data bits, no parity, 1 stop bit
Serial.print() and Serial.println() functions transmit information to connected devices. The println() function adds a newline character after the message:
Serial.print("Data: "); // Prints without newline
Serial.println(sensorValue); // Prints with newline
Two-way communication needs code that receives and transmits data:
if(Serial.available()) {
  mySerial.write(Serial.read()); // Forward data to Bluetooth
}
if(mySerial.available()) {
  Serial.write(mySerial.read()); // Forward Bluetooth data to Serial
}
Note that your Serial Monitor's baud rate should match the one in your code. Select "Both NL & CR" in line endings to communicate properly.
Testing, Troubleshooting, and Limitations
Your next big challenge comes after you assemble the hardware and upload your code - testing if your Bluetooth works right. Even well-built projects can run into connection problems. We faced these issues because Bluetooth modules need specific pairing steps and have their own limits.
How to pair Bluetooth module with a smartphone
The HC-05 module starts looking for devices right after your Arduino-Bluetooth circuit powers up. You'll see its LED blink faster at about 2 Hz. Getting connected is simple - just swipe down on your smartphone screen and make sure Bluetooth is on. Touch and hold the Bluetooth icon, pick "Pair new device" and wait until HC-05 shows up in the list.
Look for "HC-05" or sometimes "linvor" in the list and tap it. You'll need to type in the default PIN - it's usually 1234 or 0000. The module's LED will change its pattern to two quick flashes with a pause once you're connected.
You'll need a Bluetooth terminal app on your phone to test things out. Android users might want to try "Serial Bluetooth Terminal" while Windows folks can use "TeraTerm". These apps let you send commands that your Arduino code understands.
Common issues: pairing failure, no data received
Something not working? Let's check a few things. The LED should blink faster when it's ready to pair. Also, make sure no other devices are hogging the connection - your module can only talk to one device at a time.
If your module pairs but stays silent, here's what to look for:
-
Incorrect wiring – Your TX should go to RX and the other way around
-
Baud rate mismatch – The code needs to match what your module expects
-
Insufficient power – These HC-05 modules can be power-hungry - more than Arduino's 5V pin might handle
Limitations: 10m range, 9600 baud rate, no encryption
HC-05 modules come with some built-in limits. They're Class 2 devices, so they'll work up to 10 meters in open space. Walls and other stuff in the way will shrink that distance.
The modules say they work at different speeds, but they get cranky above 9600 baud, especially with lots of data. It's best to stick with the default speed to keep things running smoothly.
Security isn't these modules' strong point. Beyond that initial PIN when pairing, there's not much protection. The data isn't encrypted, so don't use them for anything sensitive. You might want to look at upgraded modules or different ways to communicate if security matters to your project.
Conclusion
Bluetooth module technology offers a perfect starting point to explore wireless electronics projects. You've learned about selecting, connecting, programming, and troubleshooting Bluetooth modules for Arduino-based projects. These simple skills will without doubt help you build more sophisticated wireless applications as your expertise grows.
Understanding the differences between HC-05, HC-06, and BLE modules helps you make smart choices based on your project's needs. On top of that, you've mastered proper wiring techniques that handle voltage compatibility between Arduino boards and Bluetooth modules effectively. The sample code gives you a foundation to build upon, and the troubleshooting section prepares you to tackle common implementation challenges.
The 10-meter range, moderate data transfer rates, and simple security features might seem limiting. Yet Bluetooth modules remain versatile components that suit many applications. These affordable devices create endless possibilities for wireless communication in DIY projects, from home automation to robotics control.
Time to apply your new knowledge? The simple LED control project serves as your first step. You can then move to more complex applications as your confidence grows. Note that hands-on experience teaches better than theory alone. Soon you'll have the skills to use Bluetooth technology in unique projects that solve ground problems or make life easier.
FAQs
Q. What is a Bluetooth module and how does it work?
A. A Bluetooth module is a device that enables wireless communication between electronic devices. It acts as a translator, converting serial data into wireless signals that can be transmitted over short distances, typically up to 10 meters.
Q. How do I choose the right Bluetooth module for my project?
A. Consider factors such as functionality (master/slave mode), power consumption, range, and compatibility with your microcontroller. For beginners, the HC-05 module is often recommended due to its versatility and ease of use.
Q. What are the basic components needed for a Bluetooth Arduino project?
A. You'll need an Arduino board (like Arduino UNO), a Bluetooth module (such as HC-05), jumper wires, a breadboard, and some resistors for voltage division. Optional components might include an LED for testing.
Q. How do I pair a Bluetooth module with my smartphone?
A. Enable Bluetooth on your smartphone and search for new devices. The module (often named "HC-05" or "linvor") should appear. Select it and enter the default PIN (usually "1234" or "0000"). Once paired, the module's LED should change its blinking pattern.
Q. What are some limitations of using Bluetooth modules in projects?
A. Bluetooth modules typically have a range of about 10 meters, which decreases with obstacles. They usually operate best at 9600 baud rate, and most don't offer encryption, making them unsuitable for transmitting sensitive information. Additionally, they may have compatibility issues with certain devices or operating systems.