Essential Drone Parts: A Comprehensive Guide
Published by Amit Saxena on 29th Aug 2024
, and flight controller")
After helping over 1,000 customers select their first drone components at Evelta, we've noticed something interesting: the questions everyone asks aren't about complex aerodynamics or programming - they're refreshingly practical. "Will this motor work with that ESC?" "Why are some frames ₹2,000 and others ₹20,000?" "What's the difference between F4 and F7 flight controllers, really?"
This guide tries to answer those exact questions. We'll walk through each essential drone component not from a textbook perspective, but from the viewpoint of someone standing in front of a parts catalog for the first time. By the end, you'll understand not just what each part does, but why it matters for your specific build; and which specifications you can safely ignore.
Table of Contents:
- Frame: The Skeleton of Your Drone
- Motors: Powering Your Drone's Flight
- Propellers: Generating Lift and Thrust
- Flight Controller: The Brain of Your Drone
- Electronic Speed Controllers (ESCs)
- Gimbals and Cameras: Expanding the Drone’s Eye
- Communication Systems: Transmitters and Receivers
- Additional Accessories (Switches, Relays, etc.) for Advanced Control
- Major Application Areas
- Conclusion
- Frequently Asked Questions
Frame: The Skeleton of Your Drone
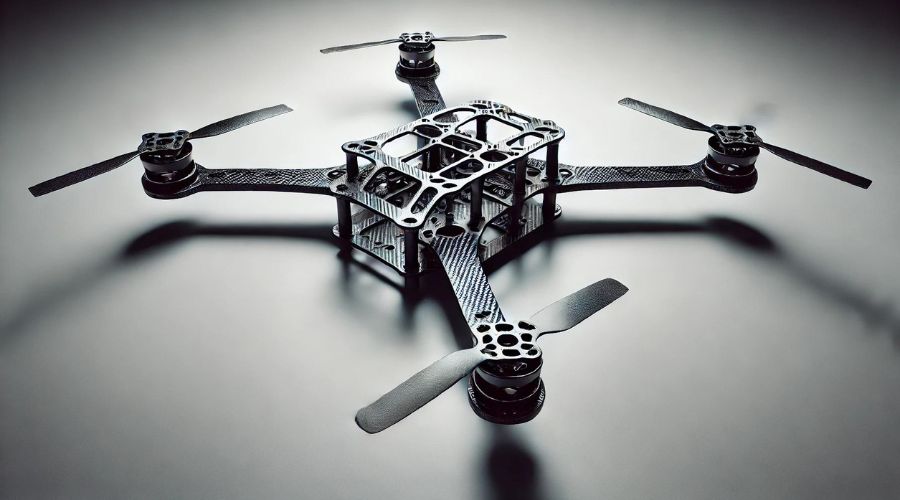
The frame serves as the structural backbone of a drone, acting as a suit of armor for all the sensitive electrical components. It provides protection to the electronics inside the drone and offers mounting points for various components such as FPV cameras, flight controllers, and video transmitters. The frame's design, material, and size have a significant impact on the drone's performance, stability, and flight characteristics.
Types of Drone Frames
Drone frames come in various configurations, each with its own advantages:
X-Frame: This is the most common design. It offers good stability and agility, making it suitable for racing and freestyle flying.
H-Frame: This design provides more space for components and can accommodate larger batteries. It's often used for long-range flights and carries heavier payloads.
Hybrid X: This combines elements of both X and H frames, offering a balance between agility and payload capacity.
Stretched X: This is an elongated version of the X-frame, providing better forward flight characteristics and stability at high speeds.
Square Frame: This design offers maximum internal space and is often used for photography drones or those carrying multiple sensors.
Each frame type has its own strengths, and the choice depends on the intended use of the drone, whether it's for racing, freestyle flying, long-range missions, or carrying payloads.
Choosing the Right Frame Material
The choice of frame material significantly affects the drone's weight, durability, and performance. The most common materials used for drone frames are:
- Carbon Fiber: This is the most popular choice for drone frames due to its exceptional strength-to-weight ratio. Carbon fiber frames are lightweight, strong, and rigid, making them ideal for racing and freestyle drones. However, they can be expensive and difficult to work with.
- Aluminum Alloys: Alloys such as 6061 and 7075 provide a good balance of strength, low weight, and affordability. They are easier to work with than carbon fiber but not as stiff.
- Fiberglass Composites: These are sometimes used for less expensive or hobbyist models. They offer a lightweight and durable option but are not as common as carbon fiber or aluminum.
- High-Density Polyethylene (HDPE): While not as strong as carbon fiber, HDPE frames are more flexible and forgiving, which can improve overall durability.
Some frames use a combination of materials, such as carbon fiber with aluminum or 3D printed TPU, to improve strength, protect components, or add flair to the design.
Frame Size Considerations
Frame size is typically measured by the diagonal distance between motors and is often categorized based on the propeller size they can accommodate. Here's a general guide to frame sizes and their uses:
| Frame Size | Prop Size | Common Use |
| 280mm+ | 7 inch | Long Range |
| 250mm | 6 inch | Long Range / Freestyle / Racing |
| 210mm | 5 inch | Freestyle / Racing |
| 180mm | 4 inch | Freestyle / Racing |
| 150mm | 3 inch | Freestyle / Racing |
| 112mm | 2 inch | Freestyle / Racing |
| <100mm | Whoops | Indoor / Limited outdoor |
The most common frame size is around 210mm, often referred to as a 5-inch frame. This size offers the best compromise between agility, weight, and responsiveness, making it suitable for both freestyle and racing.
When choosing a frame size, consider factors such as portability, agility, flight time, and payload capacity. Larger frames can accommodate bigger batteries for longer flight times and carry heavier payloads, while smaller frames are typically more agile and responsive.
The frame size also determines the size of propellers and motors you can use, which in turn affects the drone's performance and capabilities. It's crucial to select a frame size that aligns with your intended use, whether it's for racing, freestyle flying, or aerial photography.
Batteries & Power 101
The 30-Second Version
For a first 5 inch build, pick one of these and you are set:
- 4S LiPo, 1300 to 1500 mAh, XT60 connector. Pairs well with 2400 to 2550 KV motors.
- 6S LiPo, 1000 to 1100 mAh, XT60 connector. Pairs well with 1750 to 1900 KV motors.
Can't decide between 4S and 6S? Start with 4S. it's more forgiving and batteries cost less. Add a balance charger, a LiPo safe bag, and make sure your ESC and flight controller are rated for the pack voltage.
What “S” Means
“S” is the number of LiPo cells in series, which sets voltage.
- 4S = 4 cells, about 14.8 V nominal and 16.8 V full.
- 6S = 6 cells, about 22.2 V nominal and 25.2 V full.
Match motor KV to cell count. Lower voltage wants higher KV, higher voltage wants lower KV. That is why 4S pairs with around 2400 to 2550 KV on 5 inch, and 6S pairs with around 1750 to 1900 KV.
Capacity, Flight Time, and Weight
Capacity is in mAh. Bigger number usually means longer flight time, but also more weight. Your goal is a pack that gives you 3 to 5 minutes of confident flying without making the quad feel heavy or sluggish. For a 5 inch beginner build:
- 4S: 1300 to 1500 mAh is the common sweet spot.
- 6S: 1000 to 1100 mAh is the common sweet spot.
Tip: land while cells are still healthy. After the pack rests, aim to be around 3.6 to 3.8 V per cell. Going much lower shortens battery life fast.
C Rating, Without The Marketing
C rating claims how much current a pack can deliver. Rough rule:
Max current (A) ≈ Capacity (Ah) x C rating.
Example: 1500 mAh is 1.5 Ah. Labeled 75C gives 1.5 x 75 = 112.5 A on paper.
Reality check: labels are often, let's say, 'optimistic'. Plan on about half the sticker as a safe continuous number. If your voltage sags hard below 3.3 V per cell during punch outs, the pack is either too small, too tired, or not as “C” as advertised.
Connectors and Leads
- XT60 is the standard on 5 inch builds. XT30 is common on 2 to 3 inch micros.
- Every LiPo has a balance lead. Use it for balance charging every time.
- Typical wire gauge for 5 inch main leads is 14 AWG or 16 AWG. Match the connector on your ESC or be ready to solder a pigtail.
Power Distribution, The Quick Map
Battery → 4-in-1 ESC or AIO → Flight Controller → Peripherals.
- Your ESC or AIO usually provides regulated rails like 5 V and sometimes 9 V.
- Power VTX and receiver from the regulated rails, not raw battery voltage, unless the device is rated for VBAT.
- A smoke stopper on the very first power up can save your electronics if there is a short.
Charging Basics
- Balance charge every time.
- 1C is the default safe rate. A 1500 mAh pack charges at 1.5 A. Faster is possible but not needed for beginners.
- Double check the charger sees the correct cell count and target voltage before you hit Start.
- Storage at about 3.8 V per cell if you will not fly for a few days.
Safety Essentials
- Charge on a non-flammable surface, inside a LiPo safe bag, and never unattended.
- If a pack is puffed, punctured, or very hot, stop using it. Recycle at an e-waste facility.
- Keep packs away from sharp carbon edges. Use a battery strap and a non-slip pad so the pack cannot eject into the props.
Common Mistakes To Avoid
- Buying 6S packs then using high KV motors meant for 4S.
- Powering VTX or camera from VBAT when they expect a clean 5 V or 9 V rail.
- Mixing XT30 and XT60 without adapters or re-soldering.
- Charging in fast mode or without the balance lead.
- Flying packs down to the point the quad falls out of the sky. That ruins batteries quickly.
Your First Battery Purchase Checklist
- ✅ Cell count fits motors and ESC. 4S with around 2400 to 2550 KV on 5 inch, or 6S with around 1750 to 1900 KV.
- ✅ Capacity: 1300 to 1500 mAh on 4S, or 1000 to 1100 mAh on 6S, for a first 5 inch build.
- ✅ Connector matches your rig. XT60 for 5 inch is standard.
- ✅ C rating that is believable. Prefer reputable brands and avoid too-good-to-be-true labels.
- ✅ Balance charger that supports LiPo, balance mode, and storage mode.
- ✅ LiPo safe bag for charging and transport.
- ✅ Spare packs if budget allows. Two to four packs make practice sessions worth the trip.
Motors: Powering Your Drone's Flight
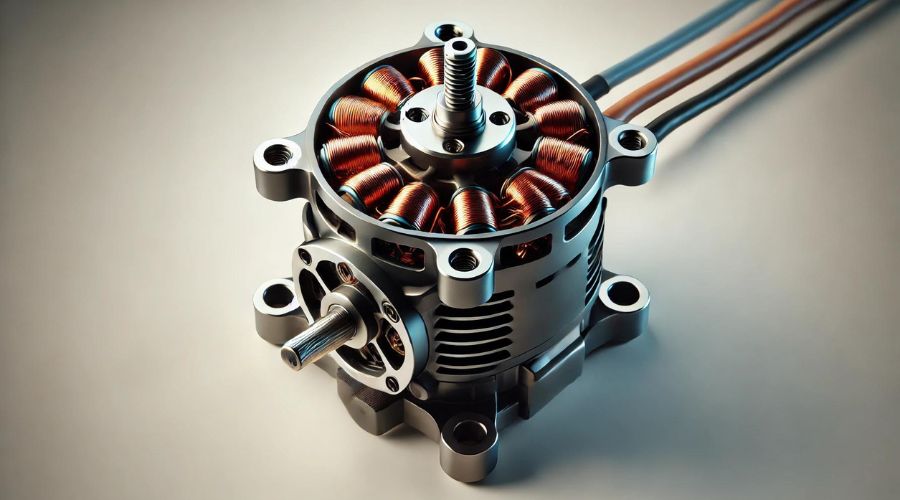
The 30-Second Version: For your first 5-inch build, grab four 2207 or 2306 brushless motors. Trust us on this one.
- Building on 4S? Go with ~2400-2550 KV (the sweet spot that just works)
- Going 6S? Pick ~1700-1900 KV (what most pilots fly today)
Expect to spend ₹500-₹1,500 per motor (ex-GST) for reliable brands and yes, it’s worth avoiding the bargain bin here. This combo covers ~90% of beginner builds, and honestly? You’ll probably love these motors for months before wanting anything different.
Now, let’s understand why these numbers matter and when you might choose differently.
Understanding Motor Sizes (It’s Simpler Than It Looks)
Motor sizes use a four-digit code that actually makes sense once you know the secret:
- 2207 = 22 mm stator diameter, 7 mm stator height
- 2306 = 23 mm stator diameter, 6 mm stator height
Here’s how it feels in the air: wider stators (like 2306) give you that smooth, predictable power perfect when you’re learning or trying to nail that gap. Taller stators (like 2207) are punchier, more “right now!” which is why racers love them. Many beginners start with 2306 for its smooth feel; 2207 is equally popular once you want more punch.
Common pairings by drone type (so you know you’re in good company):
- 2.5–3″ props: 1404–1506 motors (tiny rockets)
- 5″ props (where everyone starts): 2205–2306, 2207
- 7″ long-range cruisers: 2806–2808 / 3106
KV Rating: Your Speed vs. Control Choice
KV tells you how fast a motor spins per volt with no load. But what does that mean for your thumbsticks?
- Higher KV (≈2400-2750 on 4S): snappier, more aggressive - think caffeinated flying
- Lower KV (≈1700-2100 on 6S): smoother, more efficient - like having power steering
Where beginners thrive:
- 4S 5″: ~2400-2550 KV (responsive but forgiving)
- 6S 5″: ~1750-1900 KV (modern standard, buttery smooth)
Real-world example that’ll save your motors: A 2450 KV motor on 4S (~14.8 V) spins around 36,000 RPM unloaded perfect. Put that same motor on 6S (~22.2 V) and it’ll try for 54,000 RPM which can over-current/overheat with 5″ props (hello magic smoke). Always match KV to your battery (learned this one the expensive way).
Brushless vs. Brushed (Spoiler: You Want Brushless)
Unless you’re building a tiny whoop for flying around your living room, go brushless. Here’s why everyone does:
- They last forever (okay, not forever, but close, no brushes to wear out)
- Noticeably more flight time from better efficiency
- Way more power when you need it (and smoother when you don’t)
Yes, they cost more than brushed (₹1,500 vs ₹300), but think of it this way: brushed motors are like disposable batteries, brushless are like rechargeables. You’ll thank yourself later.
The one exception: Tiny whoops sometimes use brushed 8520 motors because they’re adorably small and cheap. That’s really it.
Mounting: The Details That Matter (Learn From Our Mistakes)
Most modern 22xx/23xx 5″ motors use a 16×16 mm M3 bolt pattern. Some models also use 16×19 mm - always check your frame and the motor product page. This isn’t the place for “it’ll probably fit.”
Prop hub fit: 5″ builds use a standard 5 mm shaft with an M5 prop nut; smaller props (2–3″) may use T-mount (2-bolt). Make sure your prop hub matches your motor’s shaft/bolt style.
The screw-length tip that’ll save your motors: Before you mount anything, test-fit your screws without props. Thread them in gently - if you feel any resistance before the screw head touches the arm, STOP. That’s the screw hitting the windings, and one more turn means a dead motor. Ask anyone who’s killed a motor this way (spoiler: everyone has at least one story).
Motor Direction and Wiring
You need two motors spinning CW and two CCW. The good news? Modern setups make this painless:
- Pick props-in or props-out in Betaflight (props-out looks cooler in footage, just saying)
- Reverse any motor in BLHeli Configurator with a few clicks
- Or go old school: swap any two of the three motor wires to reverse direction
Some listings still separate “CW” and “CCW” versions - if you see this, buy two of each; most 5″ motors use standard M5 prop nuts, and you can still reverse spin direction in software if needed. It’s like buying left and right shoes when they’re actually both adjustable.
What Your Budget Gets You (The Honest Truth)
- ~₹350-₹1000 (ex-GST): Entry-level - they’ll fly, you’ll learn, but you’ll upgrade within months
- ~₹1,000-₹1,950 (ex-GST): The sweet spot - smooth, reliable, what most of us fly daily
- ₹2,000-₹4,000+: Premium stuff - lighter, smoother, for when you can feel the difference (you’ll know when you’re ready)
Pro tip: Start in the sweet spot. Budget motors will frustrate you, and premium motors won’t make you a better pilot (yet).
Red Flags to Avoid (Save Your Money)
We’ve all been tempted by that too-good-to-be-true deal. Here’s what to run from:
- No brand or suspiciously vague specs (“powerful motor for drone” is not a spec)
- No thrust data or test results (legit manufacturers always test their stuff)
- Unusually light for the class (watch for copper-clad aluminum windings)
- Reviews mentioning “arrived bent” or “bearings feel gritty” (QC matters)
If the price seems impossible, it probably is. One crashed motor costs more than you “saved.”
Your First Motor Purchase Checklist
Before clicking “buy,” make sure you’ve got:
- ✅ Matching bolt pattern (16×16 for most, maybe 16×19) that fits your frame
- ✅ Prop hub fit: 5″ = 5 mm shaft + M5 nut; micro props may be T-mount (2-bolt)
- ✅ Right KV for your battery: ~2400-2550 KV for 4S, ~1750-1900 KV for 6S
- ✅ Set of 4 (grab a spare if budget allows future you will thank you)
- ✅ Correct screw lengths in your cart (or reuse from old motors if they fit)
- ✅ Actual brand with real specs (KV, weight, thrust data not just marketing fluff)
- ✅ If buying “CW/CCW” versions, two of each (you can still reverse in software anyway)
Final thought: Your first motors don’t need to be perfect they need to be reliable. Get something decent, learn to fly, and upgrade when you know what you actually want. We all started somewhere, and honestly? Those first motors will always be special, even after you’ve moved on to fancier stuff.
Propellers: Generating Lift and Thrust
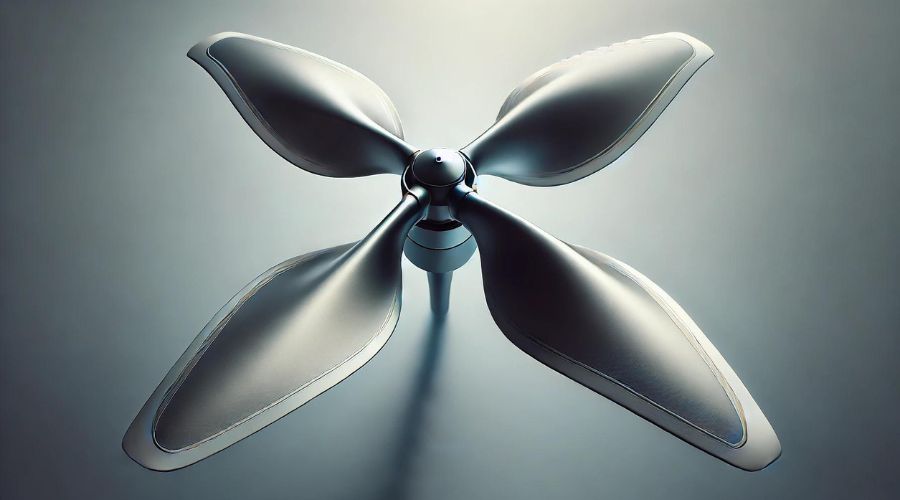
Propellers are essential components of FPV drones, determining their power, smoothness, and responsiveness. These specialized airfoils attach to the motor hub and come in various shapes, sizes, and blade counts. Understanding propellers is crucial for optimizing a quadcopter's performance.
Drone propellers work by spinning at high speeds to create thrust, which generates lift and propels the drone forward. The spinning blades create a difference in air pressure, with lower pressure on the front of the blade than on the back, generating thrust to move the drone.
Propeller Size and Pitch
Propeller size is typically given in imperial inches, with one inch equaling 2.54 cm. The format for describing propellers includes length, pitch, and the number of blades. For example, a 6x4.5x2 propeller (also known as 6045x2) is 6 inches long, has two blades, and a pitch of 4.5 inches.
Propeller pitch refers to the distance a propeller travels during one revolution, measured in inches. It essentially represents how far the propeller would move forward if it were moving through a solid medium instead of air. A higher pitch propeller moves more air with each revolution, creating more thrust at high speeds but generating less thrust when the aircraft is stationary.
The size of the propeller needed depends on the drone's size, weight, and specific application requirements. Generally, larger drones require larger propellers to supply sufficient thrust, while smaller drones can use smaller propellers.
Material Options for Propellers
Drone propellers are typically made of plastic, carbon fiber, or wood, each with its own characteristics:
- Plastic propellers: These are the most common and are used on many home-built quadcopters. They are lightweight, economical to manufacture and purchase, and easy to balance.
- Carbon fiber propellers: Although expensive compared to plastic, carbon fiber propellers are extremely lightweight, allowing for larger propellers with quick spin-up and spin-down times. They are also exceptionally strong, which can be beneficial but may transfer more force to the motor and airframe during a crash.
- Wooden propellers: While common on model airplanes, wooden propellers are rarely used on multi-rotors due to their weight. They are harder to speed up or slow down compared to plastic or carbon fiber propellers.
Flight Controller: The Brain of Your Drone
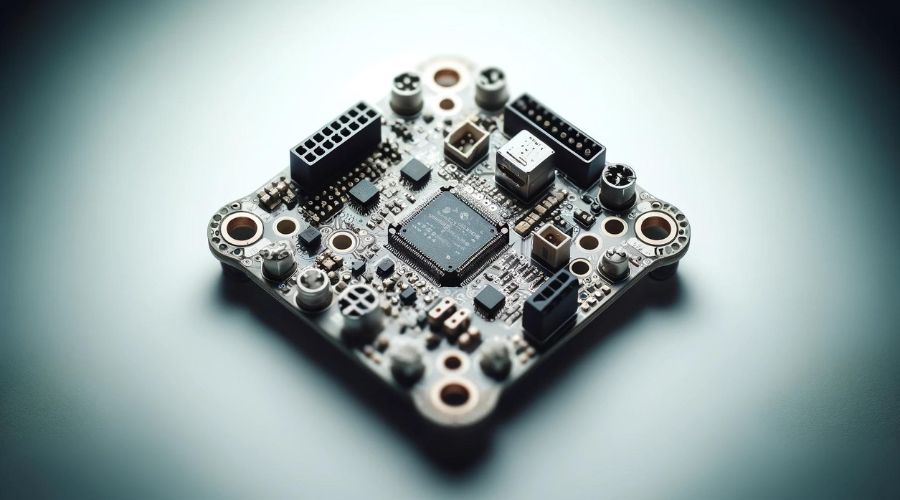
The flight controller (FC) serves as the central nervous system of a drone, coordinating its movements and functions. This small circuit board, comparable to a computer's motherboard and processor, houses intelligent electronics and software that monitor and control every aspect of the drone's operation. Connected to various sensors, the FC gathers crucial data about the drone's height, orientation, and speed, using components such as an Inertial Measurement Unit (IMU), barometer, and distance sensors.
The primary function of a flight controller is to process sensor data and pilot inputs to calculate the desired speed for each of the drone's motors. It then communicates these instructions to the Electronic Speed Controllers (ESCs), which translate the commands into signals the motors can understand. This intricate process allows the drone to rotate and accelerate by creating speed differences between its motors.
Popular Flight Controller Options
Flight controllers come in various types, catering to different user needs and skill levels:
- Hobbyist/Builder FCs: These are easy to install and budget-friendly, ideal for beginners.
- Racing FCs: Designed for lightweight, precise, and responsive performance, typically priced under €50.
- Filming FCs: Focused on creating smooth shots and user-friendly handling, often integrated into camera drones like those from DJI.
- Commercial FCs: Advanced controllers for high-value cargo transport and safe flying, with major players including DJI, Pixhawk, Auterion, and Fusion Engineering.
For multirotor drones, there are two main types of flight controllers:
- Regular FC: Uses separate boards for the flight controller and ESCs.
- All-in-One (AIO) FC: Integrates the ESC onto the same board, offering a compact setup but potentially sacrificing some robustness.
Key Features to Look For
When selecting a flight controller, consider the following essential features:
- Processor: Modern FCs use STM32 MCUs such as F4, F7, and H7. F7 and H7 processors offer superior performance for demanding tasks, while F4 remains a cost-effective option.
- Gyroscope: The gyro is crucial for balance and responsiveness. Popular options include the MPU6000 and newer ICM series, which offer improved performance when soft-mounted.
- Voltage Support: Choose an FC that supports a wide range of battery configurations, ideally up to 6S, to allow for experimentation.
- Vibration Dampening: Look for controllers with effective dampening solutions, such as silicone grommets, to minimize unwanted vibrations.
- Connectivity: Opt for controllers with dedicated ports for digital video systems and easy connectivity for VTX units, ESCs, and other FPV components.
- Barometer: While not mandatory, a built-in barometer can enhance GPS-assisted flight accuracy.
- OSD Chip: For analog FPV systems, ensure the FC has an OSD chip (AT7456E) for Betaflight OSD functionality.
Electronic Speed Controllers (ESCs)
Electronic Speed Controllers (ESCs) play a crucial role in FPV drones, acting as the intermediary between the flight controller and the motors. They receive throttle signals from the flight controller and translate them into precise motor speed adjustments. This component is essential for ensuring smooth and reliable flight performance.
Understanding ESC Ratings
When selecting an ESC for your drone build, it's important to consider two key ratings: current and voltage. The current rating, measured in amperes, indicates the maximum current an ESC can handle without sustaining damage. ESCs typically have two current ratings: continuous and burst. The continuous rating represents the consistent current an ESC can safely manage, while the burst rating indicates the maximum current it can endure for brief periods, usually under 10 seconds.
It's crucial to choose an ESC with a current rating that exceeds the maximum current draw of your motor and propeller combination. While an amp rating can never be too high, it can be too low, potentially leading to ESC failure during flight.
Voltage rating is equally important. ESCs must be compatible with your battery's voltage to prevent damage. Most modern ESCs support input voltages from 4S to 6S LiPo batteries, with some supporting even higher voltages.
Choosing the Right ESC for Your Build
When selecting an ESC for your drone build, consider the following factors:
- Current and voltage ratings
- ESC type: Single or 4-in-1
- Firmware compatibility
- ESC protocol support
- Size and weight
Single ESCs are individual units that control one motor each. They offer better cooling due to their position on the drone's arms and are easier to replace if damaged. 4-in-1 ESCs combine four ESCs on a single board, simplifying installation and reducing weight.
ESC protocols determine the communication speed between the flight controller and ESC. Modern protocols like DShot (DShot150, DShot300, DShot600) offer improved performance and are recommended for use with Betaflight.
When choosing an ESC, ensure it supports the desired protocol and is compatible with your flight controller and motors. Additionally, consider the ESC's size and weight, as these factors can affect your drone's overall performance and flight characteristics.
By carefully considering these factors, you can select the most appropriate ESC for your FPV drone build, ensuring optimal performance and reliability in flight.
Gimbals and Cameras: Expanding the Drone’s Eye

For aerial photography and videography, using a gimbal and camera setup is key to getting great and steady shots. Gimbals work as stable platforms. They keep the drone camera safe from the shakes and moves. This helps you take smooth, cinematic clips, even when it is windy or if you are moving quickly.
The type and features of your camera matter a lot. Whether you have an action camera or a built-in camera on a drone, these will affect your video shooting quality and experience. Important features include resolution, frame rate, and sensor size. Consider these when selecting a camera.
Also, advanced gimbals can provide tools like object tracking, smart flight modes, and live streaming. Spending money on a good gimbal and camera setup can really improve your work in aerial photography and videography.
Communication Systems: Transmitters and Receivers

The way you talk to your drone uses a strong system made up of a transmitter and a receiver. The transmitter looks like a fancy remote control. It sends your commands to the drone. These commands control its movements, height, and camera actions.
The receiver is on the drone. It catches these signals and sends them to the flight controller. This process helps you control the drone smoothly.
Understanding Drone Transmitters for Effective Control
The radio transmitter, often called the TX in drone language, is key to flying your drone. There are simple models that let you control the basics. Then, there are more advanced ones with LCD screens, programmable buttons, and telemetry displays. These devices come in many types and functions.
The range of the transmitter is very important. It tells you how far you can fly your drone while keeping a good connection. The way the transmitter communicates must match how your drone's receiver works to make sure everything runs smoothly.
Also, different transmitters let you control various channels. This means you can handle many functions at the same time. By learning about your transmitter's features, you can improve how you control and enjoy the flight.
The Role of Receivers in Drone Operations
The receiver on the drone plays a key role. It connects your control inputs from the transmitter to the drone's flight controller. This electronic part gets radio signals from the transmitter and turns them into commands the drone can use. To work well, the receiver needs a correctly installed and directed antenna. The antenna grabs the incoming radio waves.
Several things can affect how far and how well the communication works. These include the quality of the receiver, the type of antenna, and possible interference from outside sources. Some drones use a unit that combines the transmitter and receiver; it is called a transceiver. This design is smaller and more convenient.
To keep the receiver working well, it’s important to have a steady link with your drone. This also helps stop signal loss while flying. You should regularly check the receiver's connections, pick good quality antennas, and stay aware of possible interference. These steps can help you have a safe and fun flying experience.
Additional Accessories (Switches, Relays, etc.) for Advanced Control
Advanced drone kits may require additional accessories like switches, relays, connectors, and more for enhanced control. These components boost the functionality and customization of drones, catering to the specific needs of hobbyists and professionals alike. With a wide range of drone parts available, selecting the right accessories can meet intricate demands, ensuring precision in flight operations. Incorporating these advanced elements into a drone kit can elevate performance, offering extra control and capabilities for specialized tasks and applications.
Major Application Areas
Drone technology has revolutionized various industries with its diverse applications. As technology continues to evolve and become more accessible, we can expect to see further advancements in various sectors, enhancing efficiency, safety, and creativity across different fields.
Agriculture:
- Equipped with sensors and cameras.
- Monitor crop health, optimize irrigation, and spray pesticides.
- Increases productivity, reduces manual labor, and minimizes environmental impact.
Search and Rescue:
- Utilizes thermal imaging cameras.
- Covers large areas quickly in disaster-stricken zones.
- Locates missing persons or survivors, crucial for saving lives.
Construction:
- Used for site surveying, progress tracking, and safety inspections.
- Captures aerial images and creates 3D models.
- Helps in informed decision-making, improving efficiency, and ensuring safety compliance.
Entertainment:
- Used for light shows and aerial performances.
- Synchronized fleets of drones with LED lights create captivating displays.
- Popular at concerts, festivals, and celebrations.
Other Common Uses:
- Racing Drones for hobbyists.
- Video shooting for professionals.
- Border surveillance for defense purposes.
Conclusion
Diving into the world of drones reveals a fascinating array of components working together to create these airborne marvels. From the sturdy frame that holds everything in place to the intricate flight controller that acts as the brain, each part plays a crucial role in the drone's performance. The motors and propellers team up to generate lift and thrust, while the ESCs ensure smooth communication between the flight controller and motors.
Building or upgrading a drone requires careful consideration of each component's specifications and compatibility. The choice of frame material and size, motor KV rating, propeller dimensions, and ESC current capacity all have an impact on the drone's capabilities and flight characteristics. By understanding these essential drone parts, enthusiasts and professionals alike can make informed decisions to optimize their drones for specific applications, whether it's racing, aerial photography, or long-range flights.
Frequently Asked Questions
How do I choose the right battery for my drone?
Choosing the right battery for your drone is important. You need to think about compatibility, capacity (mAh), and discharge rate (C rating). Always check your drone's specifications. You can also look online to find compatible LiPo batteries. Make sure they have the right capacity and discharge rates for your flight time and power needs.
Can I upgrade my drone with third-party accessories?
Yes, many drones allow for upgrades with added accessories from other brands. However, it is important to make sure they will work well together before you buy or add anything. You should check what the manufacturer suggests or look at online forums and guides to confirm compatibility. This way, you can avoid any problems.
What is the importance of GPS modules in drones?
GPS modules are very important for drones. They help with navigation, accuracy, and stability. These modules give exact location information. Because of this, drones can have features like returning to their home point, following certain paths, and staying still in the air. This is even possible when the wind is strong.
How do transmitters and receivers affect drone range and control?
Transmitters and receivers are key parts of your drone system. They help with range and control. If you have a transmitter that can send signals far and a strong receiver, your connection will be reliable even at long distances. A good antenna setup can also reduce interference. This boosts signal strength and helps you maintain better control of your drone.
What are the must-have spare parts for drone enthusiasts?
For anyone who enjoys flying quadcopters, it's important to have some key spare parts close by. This helps you fix problems quickly and get back in the sky. Important spare parts are extra propellers, a spare battery, and new motors. Having these parts on hand can really help in case of small accidents or if something stops working.
Where can I find high-quality drone parts in India?
High-quality drone parts can be purchased in India from well-known online stores such as Evelta and others. You can browse through different product categories of drone components that are offered at affordable prices. Additionally, local hobby shops and specialized retailers might also provide a diverse selection of components to fulfill your building requirements.
Which drone parts are most likely to damage?
When it comes to drones, certain components are more susceptible to damage than others. Propellers are often the first to break, especially in the event of a crash or collision. Motors are another common point of failure due to wear and tear from frequent use. Additionally, landing gear can be damaged during rough landings or crashes.
To minimize the risk of damage to these critical parts, regular maintenance is essential. Checking for loose screws, ensuring propellers are securely attached, and inspecting wiring for any signs of wear can help prevent potential breakdowns. Flying cautiously, especially in challenging weather conditions or crowded areas, can also reduce the likelihood of accidents that could lead to component damage.